Drywall is a popular building material known for its versatility and ease of installation. However, like any other construction material, it is not immune to damage. Whether it’s a small hole, a dent, or a more significant issue, drywall repairs are a common part of home maintenance. To ensure a seamless and professional-looking finish, having the right tools is crucial. In this blog post, we’ll explore five essential tools for drywall repair and preparation that every DIY enthusiast or professional should have in their toolkit.
Utility Knife
A utility knife is a fundamental tool for any drywall repair project. Its sharp and retractable blade allows for precise cutting of drywall panels, enabling you to create clean edges and trim excess material with ease. When preparing the damaged area for repair, a utility knife is essential for removing any loose or damaged portions of the drywall. Additionally, it is handy for scoring the surface before making deeper cuts, making the overall repair process more manageable.
When choosing a utility knife, opt for one with a comfortable grip and a durable blade that can be easily replaced. Having spare blades on hand is also a good practice to ensure you always have a sharp edge for clean cuts.
Drywall Saw
For more extensive repairs that require cutting through the entire thickness of the drywall, a drywall saw will make your life much easier. Unlike a utility knife, a drywall saw has a serrated edge designed to cut through the gypsum core of the drywall. This tool is particularly useful when dealing with openings for electrical outlets, switches, or larger holes that cannot be adequately addressed with a utility knife alone.
When selecting a drywall saw, consider the tooth pattern and the flexibility of the blade. A saw with a comfortable grip and a pointed tip for starting cuts easily is ideal. Remember to use caution when using a drywall saw to avoid accidental injuries.
Drywall Joint Tape
Achieving a smooth and seamless finish in your drywall repair requires more than just patching up holes. Drywall joint tape is a crucial component for reinforcing the seams and preventing future cracks. There are two main types of drywall joint tape: paper tape and self-adhesive mesh tape.
Paper tape is a traditional option that requires joint compound (also known as mud) to adhere to the drywall seams. It provides a strong, long-lasting bond when properly applied. On the other hand, self-adhesive mesh tape has an adhesive backing, making it easier to apply and reducing the likelihood of air bubbles. Both types of tape serve the same purpose, so choosing between them often comes down to personal preference and experience.
Joint Compound
Joint compound, commonly referred to as mud, is a vital component in achieving a smooth and seamless finish on repaired drywall. This versatile material is used to cover joints, seams, and the indents left by screws or nails. Joint compound comes in various formulations, including quick-drying options for faster project completion.
When applying joint compound, start with a thin layer to fill gaps and cover seams. Subsequent layers should be progressively wider to feather the edges and create a seamless transition between the repair and the existing drywall. Use a putty knife or a drywall knife to spread the joint compound evenly. After each layer dries, sand the surface lightly to achieve a smooth finish.
Sanding Tools
Sanding is a critical step in the drywall repair process to achieve a polished and professional look. Sanding tools come in various forms, including sanding blocks, sanding sponges, and electric sanders. The choice of tool depends on the size of the repair area and personal preference.
Sanding blocks and sponges are excellent for small to medium-sized repairs, providing control and precision. Electric sanders, such as orbital or pole sanders, are more efficient for larger areas but require careful handling to avoid over-sanding. Always start with a coarse-grit sandpaper to remove imperfections and gradually move to finer grits for a smooth finish.
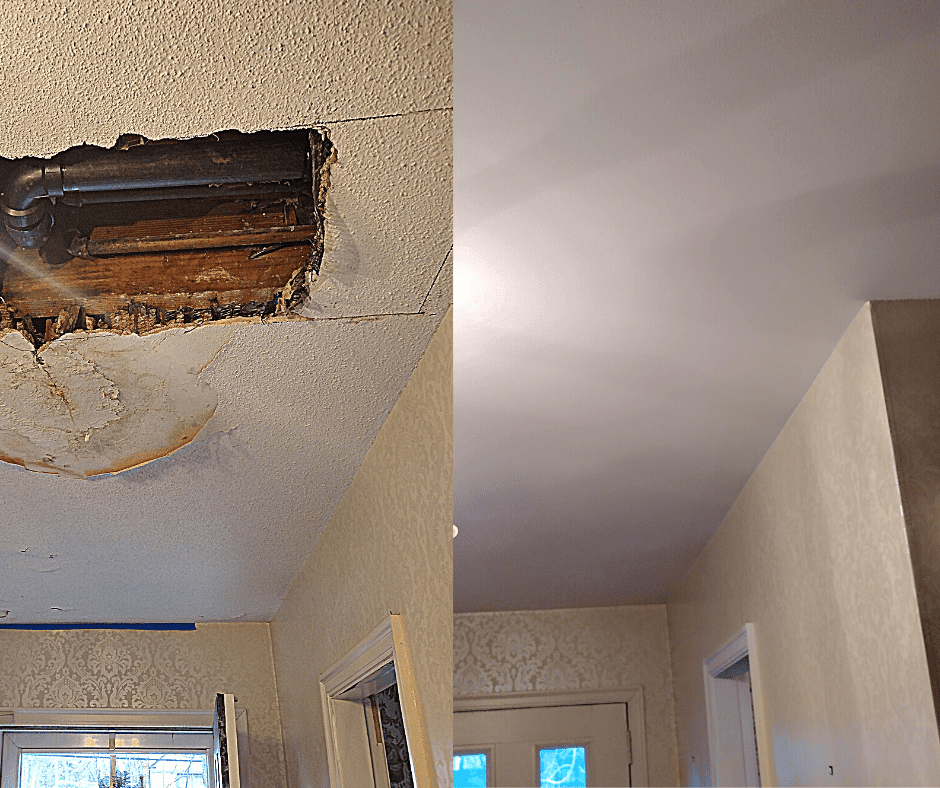
Successful drywall repair requires the right tools and techniques to achieve a seamless and professional-looking finish. From precision cutting with a utility knife to reinforcing seams with joint tape and achieving a smooth surface with joint compound and sanding tools, each tool plays a crucial role in the overall process. Whether you’re a seasoned DIY enthusiast or a professional contractor, investing in these essential tools will ensure that your drywall repairs are not only functional but also visually appealing. With the right tools and a bit of patience, you can transform damaged drywall into a flawless surface that enhances the aesthetic appeal of any space.
Willard & Ward Pro Painting had helped dozens of homeowners with their drywall repairs. If you’re looking for professional drywal preparation before painting or repairs to be made, get in touch for a free quote!